Look, I’ve made a lot of mediocre meal prep in my life. Dry chicken breast that turns into rubber by Thursday. Sauce that separates into a weird oily puddle. Rice that somehow becomes both mushy AND crunchy.
This teriyaki chicken? Not that.
Why Chicken Thighs Are Non-Negotiable
I don’t care if you’ve been buying chicken breast your whole life. For meal prep, thighs are simply better. Here’s why:
- Higher fat content = stays juicy after reheating
- More forgiving if you accidentally overcook by a few minutes
- Cheaper (usually $1-2 less per pound)
- More flavor because fat = flavor, that’s just science
Chicken breast can work, but you’ll need to be very careful not to overcook it. And honestly? Life’s too short to babysit chicken.
The Teriyaki Sauce Situation
You could buy a bottle. I won’t judge. But homemade takes 5 minutes and costs maybe 50 cents. Plus you can actually pronounce everything in it.
Here’s what goes in:
- Soy sauce (the backbone)
- Honey (sweetness without being cloying)
- Rice vinegar (brightness that cuts through the richness)
- Sesame oil (just a little — this stuff is potent)
- Garlic and ginger (non-negotiable aromatics)
The secret weapon is the cornstarch slurry at the end. It transforms the sauce from watery and forgettable to glossy and clingy. That’s what makes it stick to the chicken instead of pooling at the bottom of your container.
Let’s Actually Make This
Rice First (Get It Going)
Start your rice before anything else. I use a 1:1.5 ratio for jasmine rice — so 3 cups rice to 4.5 cups water. Some people rinse, I usually don’t. Rice cooker makes this brainless. Stovetop works too.
While Rice Cooks: Prep Everything Else
Cut your chicken thighs into bite-sized pieces. Like, actually bite-sized. Nobody wants to be sawing through a massive chunk of chicken at their desk.
Mix your sauce ingredients together EXCEPT the cornstarch slurry. Set that aside.
The Cooking Part
Heat a large skillet or wok over medium-high heat. Add a tablespoon of regular cooking oil (not the sesame oil — save that for the sauce).
Get your chicken in there in a single layer. Don’t crowd the pan or it’ll steam instead of sear. You might need to work in batches. This is annoying but important.
Cook 4-5 minutes per side until golden brown and cooked through. The internal temp should hit 165°F if you want to be precise about it.
Remove chicken to a plate. In the same pan, add your sauce mixture. Let it bubble for about 2 minutes. Then stir in the cornstarch slurry and watch it thicken up in like 30 seconds.
Toss the chicken back in. Coat everything in that beautiful sticky sauce.
Don’t Forget the Broccoli
Steam it. Microwave it. Roast it. I genuinely don’t care how you cook broccoli. Just don’t boil it into mush.
I usually steam mine for 4-5 minutes while the chicken is cooking. Slightly undercook it since it’ll heat up again when you reheat your meals.
Assembly Time
Okay this is the satisfying part.
Grab your 5 meal prep containers. In each one:
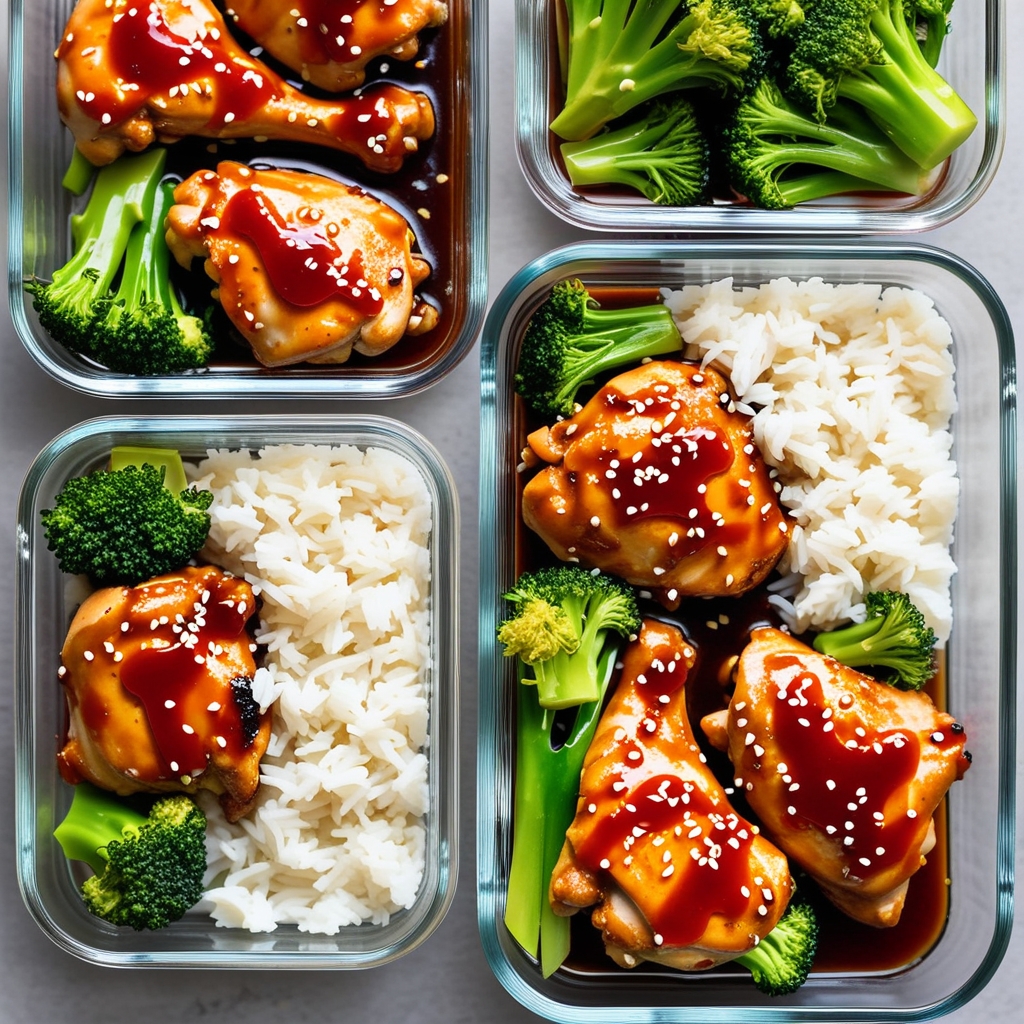
- ~1 cup cooked rice
- 4-5 oz teriyaki chicken
- Healthy handful of broccoli
- Drizzle of extra sauce if you made some
Sprinkle sesame seeds and green onions on top. This seems like a small detail but it makes a huge visual difference. You want to actually want to eat this on a random Tuesday.
Storage & Reheating
These keep in the fridge for 5 days easily. I’ve pushed it to 6 and lived to tell the tale, but 5 is the safe zone.
To reheat:
- Pop the lid open slightly (steam needs to escape)
- Microwave 2-2.5 minutes
- Stir halfway through if you remember
- Let it sit for a minute before eating — patience, young grasshopper
The sauce actually gets more flavorful as it sits. The flavors meld together. Day 3-4 is honestly peak teriyaki chicken.
Quick Tips Before You Go
If your sauce is too salty: Add more honey. Or a splash of water. It’s fixable.
If your sauce is too thick: Add water, a tablespoon at a time. Also fixable.
Want more vegetables? Throw in snap peas, bell peppers, or shredded cabbage. All of these work great.
Making this for someone who doesn’t like spice? Skip the ginger and you’ll be fine. Or add sriracha/chili flakes if you want heat.
Don’t have rice vinegar? Regular white vinegar works. Apple cider vinegar is… fine. Not ideal, but it’ll do.
That’s it. About 35 minutes of actual work and you’ve got lunches for the week. The cost per serving works out to under $3, you’re getting nearly 40g of protein per container, and it legitimately tastes good.
I’ve been making this pretty much every other week for months now. It doesn’t get old. Make it.
More Asian-Inspired Meal Prep
If you’re into these flavors, try these next:
- Thai Peanut Chicken Rice Bowls — Creamy peanut sauce that reheats perfectly
- Korean Beef Bowls — Sweet and savory, ready in 20 minutes
- Honey Garlic Chicken — Same vibes, different sauce
- High Protein Meal Prep Guide — More recipes if you’re building muscle