Look, I’ve made a lot of meal preps that technically work but taste like sad cardboard by Wednesday. These meatballs? Not even close to that problem.
They actually get better sitting in that marinara. I know that sounds like something your Italian grandma would say, but it’s true. The flavors meld. The meatballs absorb some sauce. Day 4 hits different than day 1 — in a good way.
Why Meatballs Are Peak Meal Prep
Here’s the thing about chicken breast meal prep (yeah, I’m calling it out): it dries out. You microwave it, it gets rubbery, and suddenly you’re choking down protein out of obligation rather than enjoyment.
Meatballs don’t have this problem.
The fat content keeps them juicy. The sauce keeps them moist. And because they’re small, they reheat evenly — no cold center while the outside is lava temperature.
The numbers:
- Total cost: ~$9.10 for 5 meals
- Time investment: 45 minutes
- Freezer friendly: Hell yes (up to 3 months)
- Reheat time: 2-3 minutes
The Meatball Mix — Don’t Skip the Breadcrumbs
I’ve seen recipes that try to go “clean” and skip breadcrumbs entirely. Those meatballs end up dense and dry. The breadcrumbs serve a purpose — they absorb moisture and keep things tender.
Combine everything in a big bowl:
- Ground beef
- Breadcrumbs
- Parmesan (the good stuff from the green can works fine, relax)
- Egg
- Garlic
- Italian seasoning
- Salt and pepper
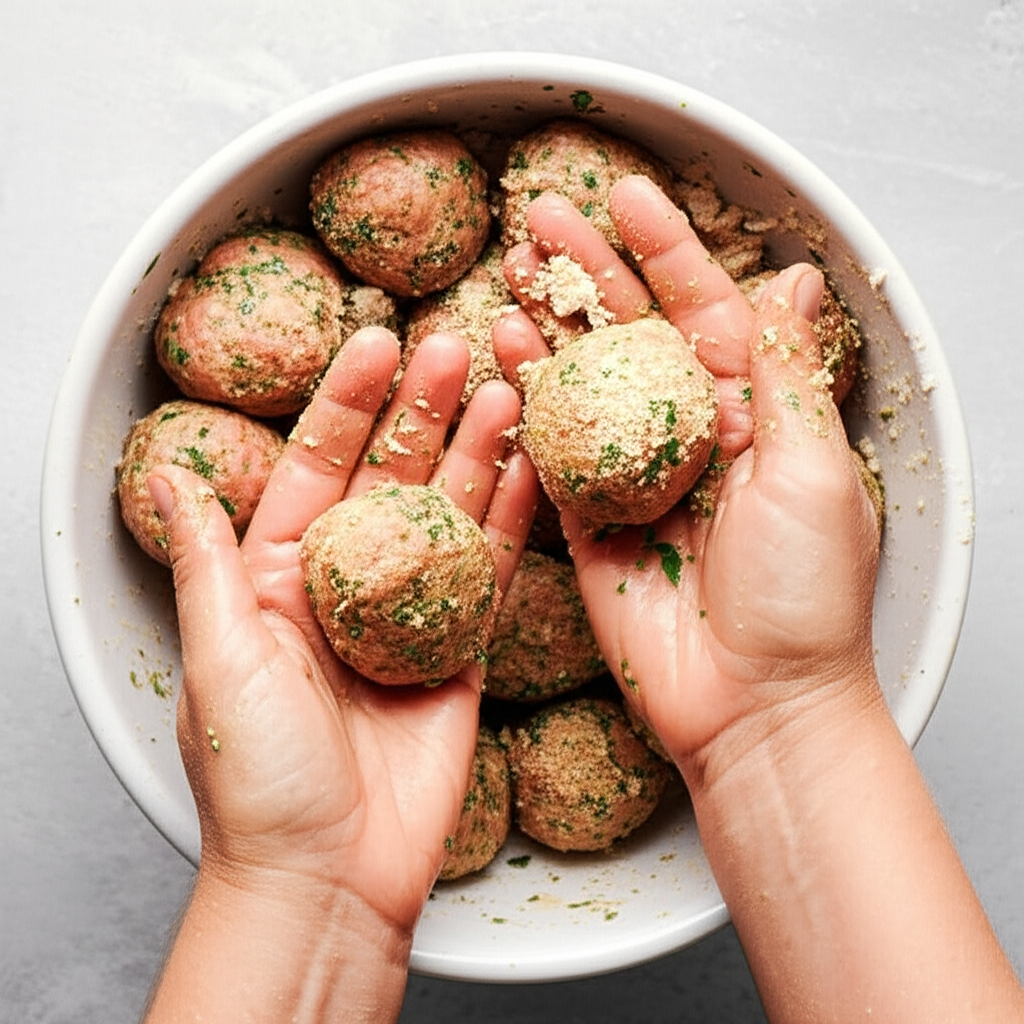
Pro tip that nobody talks about: Don’t overmix. Seriously. Mix until just combined and then stop touching it. Overworked meatballs get tough because you’re basically developing gluten and compressing the meat.
I use my hands for about 30 seconds. That’s it. If you can still see a few breadcrumb streaks, perfect.
Rolling Technique (Yes, It Matters)
Wet your hands with cold water between every few meatballs. This does two things:
- Prevents sticking (obvious)
- Creates a slightly smoother exterior that browns better (not obvious)
Go for golf ball size. Slightly smaller than you think. They’ll puff up slightly when cooking, and you want them to fit nicely in meal prep containers.
I usually get 20 meatballs from this recipe. Four per container, five meals. Math.
The Sear Is Non-Negotiable
You could bake these. Some people do. But browning them in a hot pan first gives you:
- Maillard reaction (that’s the sciency term for “tastes way better”)
- Better texture on the outside
- More flavor depth
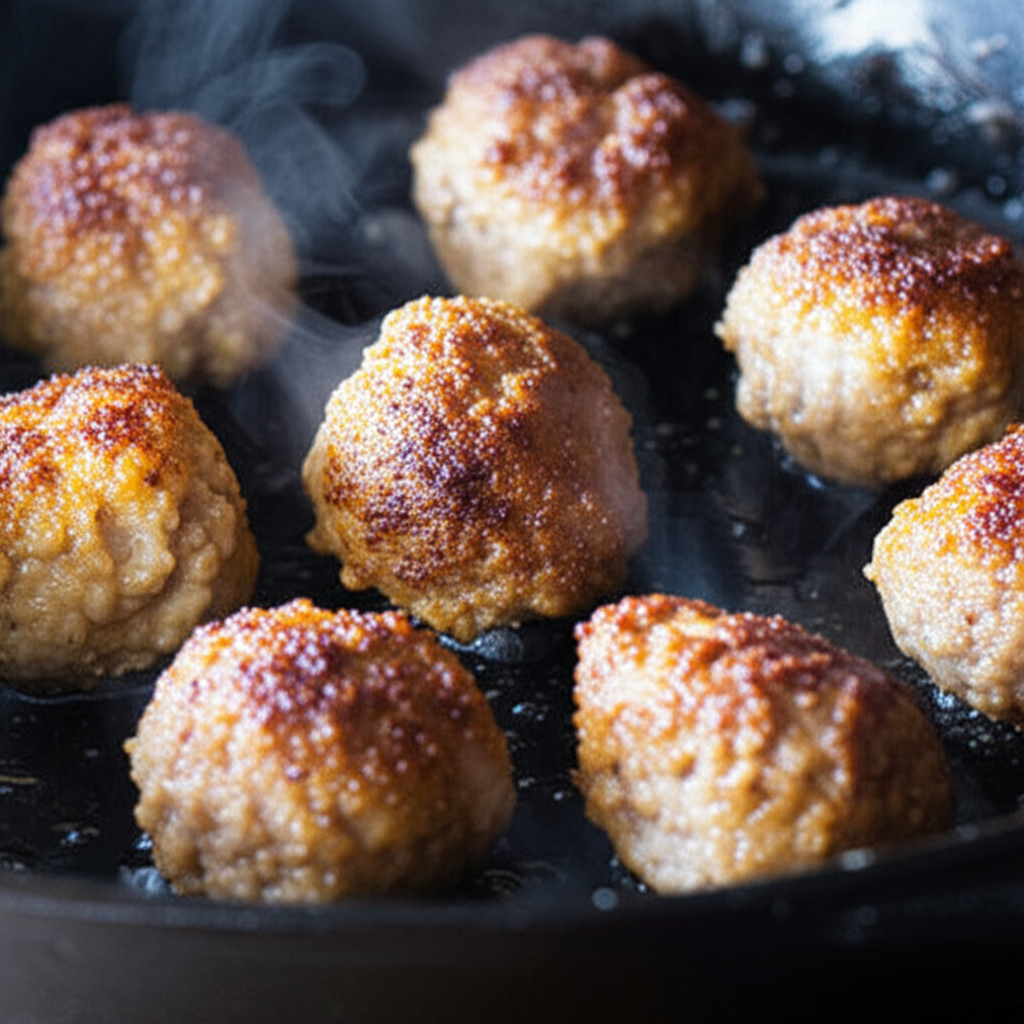
Get your pan screaming hot with a tablespoon of oil. Add meatballs — don’t crowd them or they’ll steam instead of sear. Work in batches if needed.
Brown on two sides, about 2 minutes each. They don’t need to be cooked through yet — they’ll finish in the sauce.
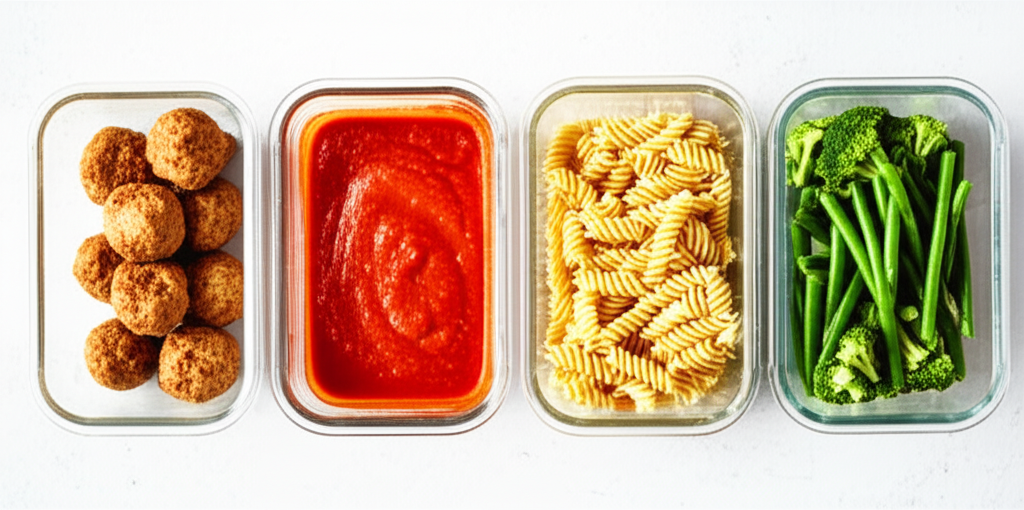
The Sauce Simmer
Here’s where some recipes get fancy and make sauce from scratch. That’s great if you have time. I don’t.
A $3 jar of marinara works perfectly. Rao’s if you’re feeling fancy, store brand if you’re being smart with money.
Pour sauce in the same pan you browned the meatballs in (don’t you dare wash that pan first — those brown bits are flavor gold). Nestle meatballs in, bring to a simmer, cover, and let them cook for 15 minutes.
Done. Meatballs are cooked through and have absorbed some of that saucy goodness.
The Sides Situation
While your meatballs simmer, handle the rice and broccoli.
Rice: Cook according to package directions. I use a rice cooker because I’m not a savage. 2 cups dry rice, appropriate water, press button.
Broccoli: Steam it. Microwave steamer bags work great and cost like 89 cents. Or throw florets in a covered microwave-safe bowl with 2 tablespoons of water for 3 minutes.
Don’t overcook the broccoli. It should still have some bite — it’ll soften more when you reheat during the week.
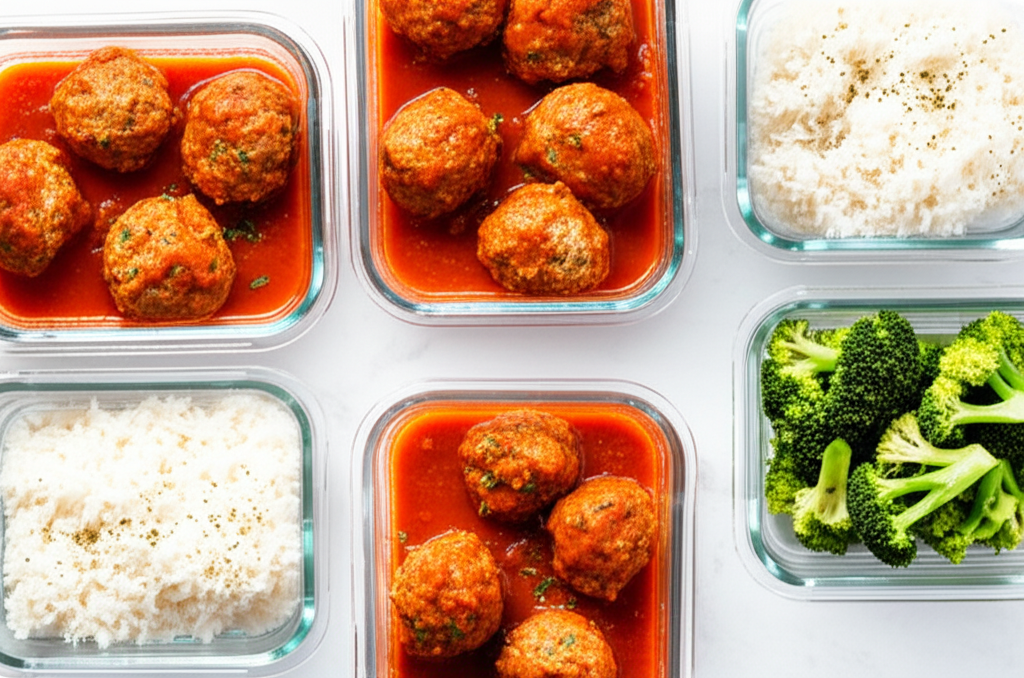
Assembly Line Time
This is the satisfying part.
Line up your 5 containers. Add to each:
- About 3/4 cup cooked rice
- 4 meatballs
- Good ladle of marinara sauce over the meatballs
- Generous portion of broccoli
I keep the broccoli separate from the sauce. Nobody wants soggy marinara broccoli. Just tuck it to the side.
Storage & Reheating
Fridge life: 4-5 days easy. The sauce actually helps preserve the meatballs.
Freezing: These freeze beautifully. Let containers cool completely, then freeze for up to 3 months. Thaw overnight in fridge before reheating.
Reheating options:
Microwave (weekday reality): 2-3 minutes, stirring halfway. Add a splash of water if sauce looks thick.
Oven (weekend luxury): 350°F for 15 minutes covered with foil. This gives you that fresh-baked situation.
Variations I’ve Tested
Because sometimes you want to mix things up:
| Variation | What to Change | Notes |
|---|---|---|
| Turkey meatballs | Swap beef for ground turkey | Add extra breadcrumbs, turkey is lean |
| Spicy | Add 1/2 tsp red pepper flakes to mix | Great with arrabiata sauce |
| Pesto vibes | Use pesto instead of marinara | Different but delicious |
| Swedish-ish | Brown gravy instead of marinara | Serve over egg noodles |
The turkey version clocks in around $1.50 per meal if you catch turkey on sale. Just don’t skip the extra breadcrumbs — lean meat dries out faster.
The Real Cost Breakdown
Let me show my work because I hate when blogs just throw out numbers:
- Ground beef (1.5 lbs @ $4.99/lb): $7.49
- Breadcrumbs: $0.40 (partial bag)
- Parmesan: $0.75 (partial container)
- Egg: $0.25
- Garlic: $0.20
- Marinara jar: $2.99
- Rice: $0.60
- Broccoli: $2.00
Total: ~$9.10 / 5 servings = $1.82 per meal
Compare that to takeout meatball subs at $12+. Or even frozen meatball dinners at $4-5 each. This is cheaper AND better.
Mistakes I Made So You Don’t Have To
First attempt: Made meatballs too big. They didn’t cook evenly in the sauce and the centers were questionable. Stick to golf ball size or slightly smaller.
Second attempt: Skipped the sear because I was lazy. They were fine but… flat. That browning really matters for depth of flavor.
Third attempt: Overcooked the broccoli. By day 3 it was mush. Now I slightly undercook on purpose.
Fourth attempt: Stored everything hot. Condensation made things soggy. Always let food cool before sealing containers.
Bottom Line
This is one of those meal preps that doesn’t feel like meal prep when you’re eating it. You open the container and it actually looks like food you’d order, not something you’re forcing yourself to eat because you already made it.
The 45-minute investment pays off all week. Your future self will be grateful.
And honestly? I’d eat these even if I wasn’t meal prepping. They’re just good meatballs that happen to store well.
Next week I’m testing a Korean BBQ meatball variation. Because why not.